Tuesday, May 26, 2009

Eight Useful CSS Generators for Designers


1. CSS Button and Text Field Generator
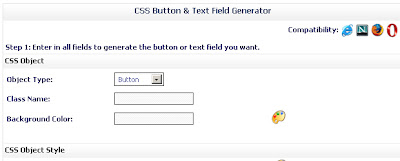
CSS Button and Text Field Generator. Useful Online tool for creating button.

2. CSS Layout Generator
CSS Layout Generator

3. CSS Formatter and Optimiser
CSS Formatter and Optimiser

4. CSS Form Code Maker
CSS Form Code Maker

5. CSS Menu Generator
CSS Menu Generator

6. Create Rounded CSS Corners
Create Rounded CSS Corners

7. CSS Tab Designer
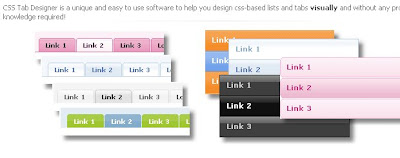
CSS Tab Designer

8. CSS Scrollbar Color Changer
CSS Scrollbar Color Changer

IE Zoom Options Problem......

IE 7+ gives the option to zoom the page using the corner options in Internet Explorer.

I faced one problem because of this zoom control. I have developed one site for 1024 x 768 resolution. I have used some background image in body tag. I have used the same background in my main table also. If some one view the site in other large resolution, I have used the main table should be align center and the remaining part will have a background image which I have applied in body tag. Everything is perfectly working. One time my client was used the zoom control in IE and he used 1280 resolution window, Everything was zoomed and he noticed that main table background is diffent from the body tag background. After this he sent a mail, designer not using the same background in the entire screen. This is not a good design work. So my PM and PL give lot of advice to me.

I was really shocked at that time. Because I used the same background in both the body and main tables. I tested in all the resolution with the zoom control, but getting the same problem.

At last I came to realize that IE won't zooming the background image of body tag. This is really gave so much tension at that time. So I used the div tag instead body tag to apply the background iamge. After that I didn't get those problem...

I hope this post helpful for you.....

Friday, May 15, 2009

CSS1 Vs CSS2

There are some really interesting differences between Cascading Style Sheets level 1 and level 2. CSS2 offers many new options for accessibility and use across various user agents. Positioning in CSS2 is more flexible and offers more options to the designer. Automated content allows developers to force the user agent to display specific content elements as well as the layout, look, and feel. Also there is support for special cursors in CSS2 as well as dynamic outlining.

Improved Features over CSS1

Font selection
When choosing which font to use, CSS2 offers both the standard "name matching" system that CSS1 uses, plus three other methods for defining fonts. These are: intelligent font matching, where the user agent uses a font that is the closest match to the requested font. Font synthesis, where the user agent creates a font that matches the metrics of the requested font. And font download, where the user agent retrieves a font over the Web.

Tables
CSS2 recognizes that there might not be a table element (and related elements) in an XML document - but to display tabular data, it is important to have this as a style. So CSS2 allows you to define any element as a table element (and all the related table elements).

Positioning
While CSS1 had some aspects of positioning, CSS2 takes it to the next level. Relative and absolute positioning determine their location based on their placement within the document or based on the user agent. But along with absolute positioning is the concept of fixed positioning. This acts as a sort of "watermark" in continuous media. In paged media, an element with fixed position is repeated on every page. This allows you to create frame-like documents or place a signature on every page of a document.

Cursors
Now you can define how you want your cursor to respond to various actions. For example, you might want the default behavior over a link to be changed over some of the links in your document. With CSS2 you can define how the cursor should look over any element.

Accessibility and CSS2
Aural style sheets
With CSS2, there are now style properties to define an aural style sheet for your documents. This means, that if a customer comes to your Web page with a screen reader that is CSS2 enabled, you can define how your page will sound. And this isn't just useful for blind customers, with aural CSS your documents can be listened to in automobiles, as auditory documentation for training, entertainment, and even for people who simply can't read.

Paging
CSS1 dealt almost solely with "continuous media" - that is, media like Web pages that would run continuously until the end. Paged media, such as paper, slide shows, or transparencies were not handled. But with CSS2, it is possible to define how pages should be displayed or printed. This means that you can specify the size of the page to be printed, add things like crop marks and register marks, or how the page should layout on double- and single-sided printings.

Media Types
CSS2 media types allow you to specify different style rules depending upon how your document is going to be displayed. There are many different types you can specify, including: aural, braille, handheld, screen, print, and tv (plus others).

International Accessibility Features
CSS2 now offers features such as more list styles for international documents, support for bidirectional text, and language-sensitive quotation marks.

There are many other features that are new with CSS2, but these are some of the most exciting ones. There are also elements like text-shadows, new pseudo-classes, the use of system colors, and dynamic outlines. You can find out more about the differences between CSS1 and CSS2 on the W3C Web site.

Reference: http://webdesign.about.com/

Writing effective ALT text for images

Anyone who knows anything about web accessibility knows that images need alternative, or ALT, text assigned to them. This is because screen readers can't understand images, but rather read aloud the alternative text assigned to them. In Internet Explorer we can see this ALT text, simply by mousing over the image and looking at the yellow tooltip that appears. Other browsers (correctly) don't do this. The HTML for inserting ALT text is:

img src="filename.gif" alt="Alternative description goes here"

But surely there can't be a skill to writing ALT text for images? You just pop a description in there and you're good to go, right? Well, kind of. Sure, it's not rocket science, but there are a few guidelines you need to follow...

Spacer images and missing ALT text
Spacer images should always be assigned null ALT text, or alt="". This way most screen readers will completely ignore the image and won't even announce its presence. Spacer images are invisible images that pretty most websites use. The purpose of them is, as the name suggests, to create space on the page. Sometimes it's not possible to create the visual display you need, so you can stick an image in (specifying its height and width) and voliĆ , you have the extra space you need.

Not everyone uses this null ALT text for spacer images. Some websites stick in alt="spacer image". Imagine how annoying this can be for a screen reader user, especially when you have ten of them in a row. A screen reader would say, “Image, spacer image” ten times in a row (screen readers usually say the word, “Image”, before reading out its ALT text) - now that isn't helpful!

Other web developers simply leave out the ALT attribute for spacer images (and perhaps other images). In this case, most screen readers will read out the filename, which could be ‘newsite/images/onepixelspacer.gif’. A screen reader would announce this image as “Image, newsite slash images slash one pixel spacer dot gif”. Imagine what this would sound like if there were ten of these in a row!

Bullets and iconsOnline poll
Bullets and icons should be treated in much the same way as spacer images, so should be assigned null alternative text, or alt="". Think about a list of items with a fancy bullet proceeding each item. If the ALT text, ‘Bullet’ is assigned to each image then, “Image, bullet” will be read aloud by screen readers before each list item, making it take that bit longer to work through the list.

Many websites use the link text as the ALT text of the icon. Imagine if in this example the icon was assigned alt="contact us". Screen readers would first announce this ALT text, and then the link text, so would say “Contact us” twice, which obviously isn't necessary.

(Ideally, bullets and icons should be called up as background images through the CSS document - this would remove them from the HTML document completely and therefore remove the need for any ALT description.)

Decorative images
Decorative images too should be assigned null alternative text, or alt="". If an image is pure eye candy then there's no need for a screen reader user to even know it's there and being informed of its presence simply adds to the noise pollution.

Conversely, you could argue that the images on your site create a brand identity and by hiding them from screen reader users you're denying this group of users the same experience. Accessibility experts tend to favour the former argument, but there certainly is a valid case for the latter too.

Navigation & text embedded within images
Navigation menus that require fancy text have no choice but to embed the text within an image. In this situation, the ALT text shouldn't be used to expand on the image. Under no circumstances should the ALT text say, ‘Read all about our fantastic services, designed to help you in everything you do’. If the menu item says, ‘Services’ then the ALT text should also say ‘Services’. ALT text should always describe the content of the image and should repeat the text word-for-word. If you want to expand on the navigation, such as in this example, you can use the title attribute.

The same applies for any other text embedded within an image. The ALT text should simply repeat, word-for-word, the text contained within that image.

(Unless the font being used is especially unique it's often unnecessary to embed text within images - advanced navigation and background effects can now be achieved with CSS.)

Company logo
Websites tend to vary in how they apply ALT text to logos. Some say, ‘Company name’, others ‘Company name logo’, and other describe the function of the image (usually a link back to the homepage), ‘Back to home’. Remember, ALT text should always describe the content of the image so the first example, alt="Company name", is probably the best. If the logo is a link back to the homepage then this can be effectively communicated through the title tag.

Conclusion
Writing effective ALT text isn't too difficult. If it's a decorative image then null alternative text, or alt="" should usually be used - never, ever omit the ALT attribute. If the image contains text then the ALT text should simply repeat this text, word-for-word. Remember, ALT text should describe the content of the image and nothing more.

Do also be sure also to keep ALT text as short and succinct as possible. Listening to a web page with a screen reader takes a lot longer than traditional methods, so don't make the surfing experience painful for screen reader users with bloated and unnecessary ALT text.


Reference: http://www.webcredible.co.uk/
Friday, May 08, 2009

How to fix the PNG image transperancy problem in IE?

PNG image transparency not working in IE 6.0 or less than 6.0

If you want to use the transperancy then use the following script in your html. Call this function in the image onLoad function....

SCRIPT:
--------

var arVersion = navigator.appVersion.split("MSIE")
var version = parseFloat(arVersion[1])
function fixPNG(myImage)
{
if ((version >= 5.5) && (version < 7) && (document.body.filters))
{
var imgID = (myImage.id) ? "id='" + myImage.id + "' " : ""
var imgClass = (myImage.className) ? "class='" + myImage.className + "' " : ""
var imgTitle = (myImage.title) ?
"title='" + myImage.title + "' " : "title='" + myImage.alt + "' "
var imgStyle = "display:inline-block;" + myImage.style.cssText
var strNewHTML = "+ " style=\"" + "width:" + myImage.width
+ "px; height:" + myImage.height
+ "px;" + imgStyle + ";"
+ "filterrogidXImageTransform.Microsoft.AlphaImageLoader"
+ "(src=\'" + myImage.src + "\', sizingMethod='scale');\">
"
myImage.outerHTML = strNewHTML
}
}

------------------------

For example, if you use the test.png file then the code like this...

img src="http://www.blogger.com/test.png" onload="fixPNG(this)"

Thursday, May 07, 2009

How can we resolve javascript Error "Operation Aborted"?

This Error will come only if you are using IE 7 or less version. If you are using DOM object inside your page, sometimes it's trying to access the particular "div" tag before it's loading. At that particular time it will through the error. Once you refreshed the page it will work.

Here is the simple solution for this problem. When you include the script in your page, add "defer='defer'" inside the script tag. So your script will look like the following..

script language='javascript' defer='defer' type='text/javascript' src='test.js'

Wednesday, May 06, 2009

how to place a layer over the flash?

Normally if you create a layer over flash, flash content only will coming on top layer. If you want avoid that one you can use the following code in the embed tag.

param name="wmode" value="opaque"
embed wmode="opaque"